
What is Outlook POP3 Mail?
In Outlook, POP3 (Post Office Protocol 3) is an older but still widely used email retrieval protocol that downloads email messages from a server to a local device. POP3 downloads emails directly to your computer or another device and in most cases deletes them from the mail server.
This is especially advantageous in scenarios where the internet connection is intermittent or where storing emails offline is important. However, POP3 is generally optimized for accessing email from a single device and may not be ideal for users who need synchronized access from multiple devices.
In terms of modern email usage, alternatives like IMAP and Exchange provide a more flexible and accessible experience by keeping emails on the server.
How to Set Up Outlook POP3?
First, search for "Control Panel" in the search bar located in the Start menu on your computer and open it.
Then find and select "Mail (Microsoft Outlook)". If you do not see this option when you open the Control Panel, change the View by setting from Category to Small icons and check again.
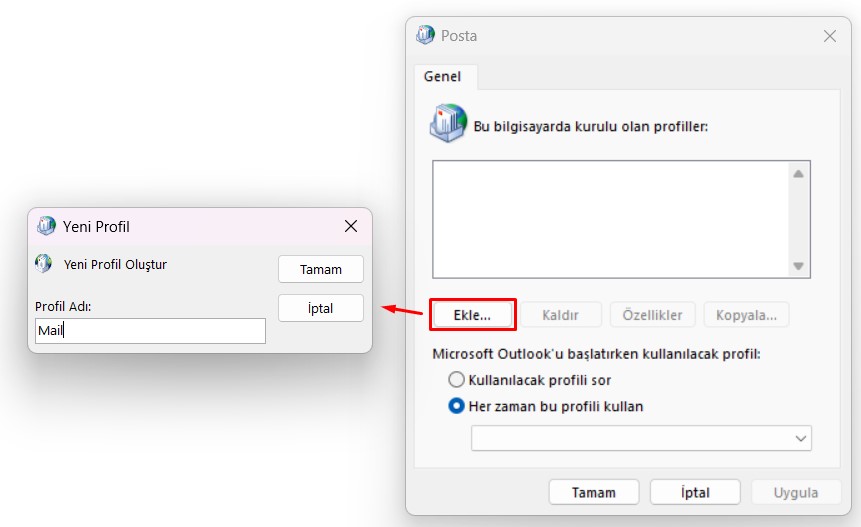
When a window like the one in the image opens, click "Add" to create a new profile first.
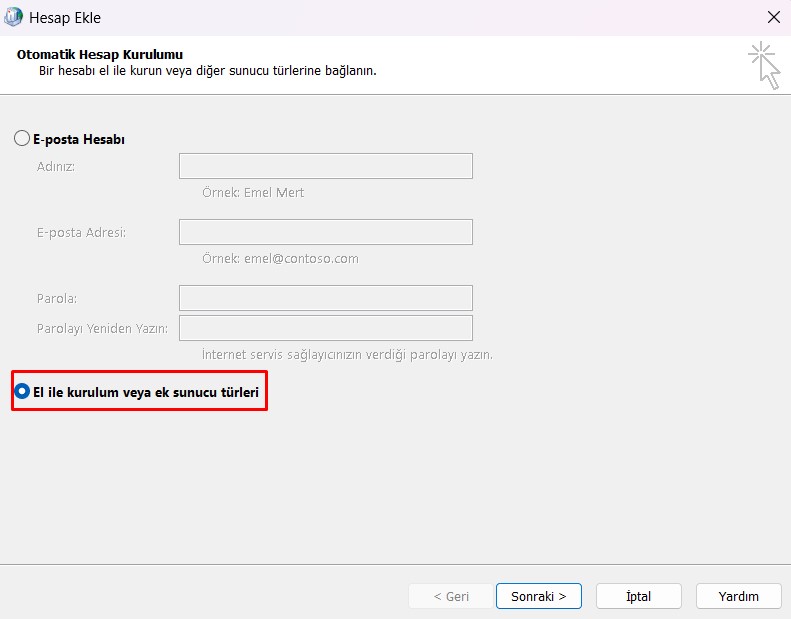
In the Add Account window that opens, without filling the boxes, click "Manual setup or additional server types" and continue with the next option. Then, select "POP or IMAP" as your Account Type.

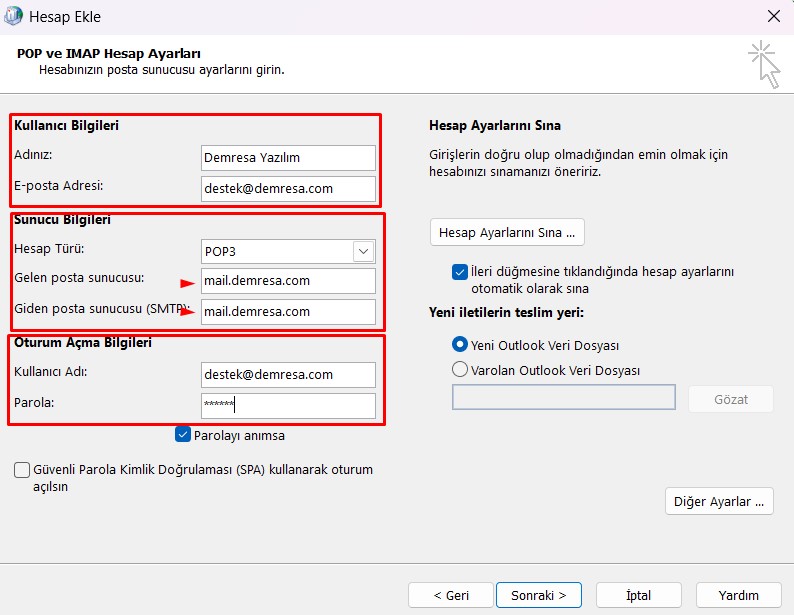
After selecting the required options, fill in your information in the POP and IMAP Account Settings section by referencing the highlighted parts in the image.
Make sure the account type is set to POP3.
The Incoming Mail Server and Outgoing Mail Server boxes must be the same, so be careful when typing and do not enter different information.
After filling in all required fields, click the More Settings button located above the help button.
In the first General tab that appears, there is nothing you need to do, but if you want, you can change the Mail Account name to your preference.
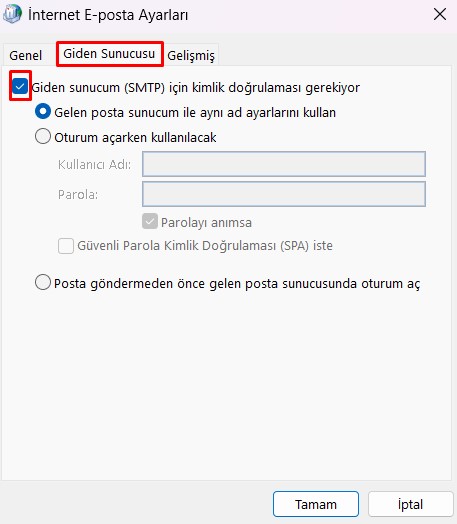
Go to the Outgoing Server tab and check the box for "My outgoing server (SMTP) requires authentication" as indicated in the image. You don't need to change other settings in this tab.
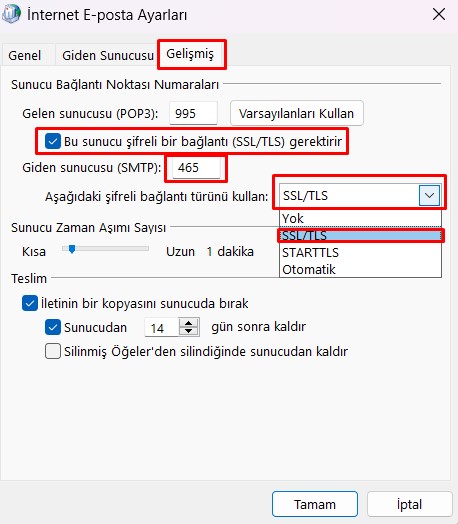
Go to the Advanced tab and first check the box for "This server requires an encrypted connection (SSL/TLS)."
Then, select SSL/TLS from the "Use the following type of encrypted connection" dropdown.
Finally, change the value of the "Outgoing Server (SMTP)" box to 465.
After completing all these steps, click OK, then Next, and finally wait for the setup to finish.
Once everything is completed, open the Outlook application and verify the setup.